We’re currently relocating, So some orders may be delayed during this time.
If you have any questions, please call us on 0419 795 093.
Thanks for your patience and understanding. We’ll be back to normal operations on 27 August .
Welcome to DIY Shade Sails! Your one-stop shop for custom shade solutions
We have been manufacturing Commercial quality Shade Sails at our Brisbane Factory since 1994. We specialise in the manufacture of Shadecloth Shade Sails and Waterproof Shade Sails.
Our preferred Shadecloth material is heavy duty but also light weight. This makes for ease of installation whilst being durable and long lasting.
Our Waterproof Shadecloth Shade Sails are manufactured with 100% Waterproof, Heavy Duty Shade Fabric. Heat stentored , waterproof laminate backing.
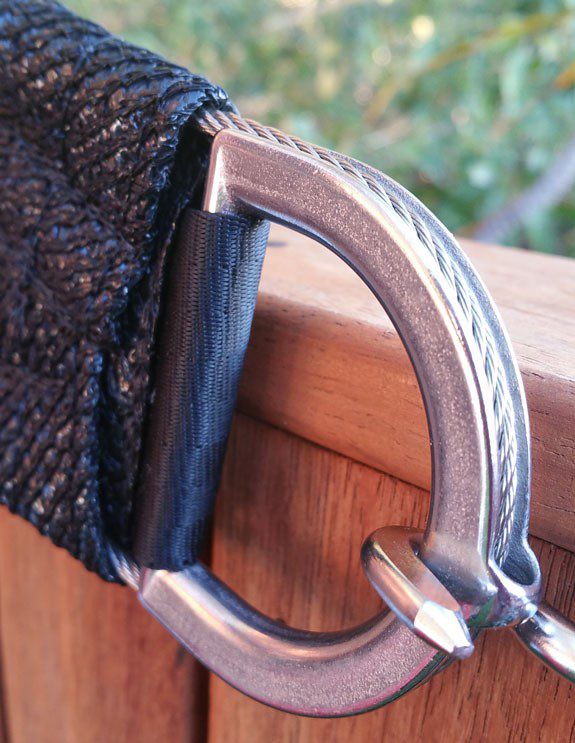
ALL OF OUR DIY SHADE SAILS ARE PERIMETER WIRED WITH 316 STAINLESS STEEL CABLE.
This is the only reliable way to fully stretch the Sail drum tight, giving the Shade Sail the ability to ride out storms.
Beware of imposters selling cheap, imitation, webbing strap edged Shade Sails which do not allow the fabric to be stretched.
All Shade Sails are manufactured at our Brisbane Factory using Tension Membrane specific CAD software and sewn by highly skilled machinists with many years industrial sewing experience.
Over 25,000 Shade Sails produced for Customers all over Australia and beyond.
“How to Install a Sail in 8 Easy Steps”
- Fabric Sails – Put the seams and hems on the top. This will stop mould build-up and make it easier to dry.
Waterproof Sails – Put the laminated side, seams and hems facing down. This protects the lamination. - Attach the direct fix points first.
- Open, lube, and hang the turnbuckles off the posts. Use some graphite anti-seize, vaseline, sewing machine oil, or axle grease. It’s important to lube the turnbuckles because SST is brittle and will seize if you’re not careful.
- Make sure the right-turning end of the turnbuckle is on the post, not the sail. The left-hand end goes on the sail.
- Lube the corner fitting (D ring) cable groove. This’ll stop the cable from sticking as you tighten the sail. A spray can of lubricant with a nozzle is the easiest way to do this.
- Fix the sail to each fixing point using the starter cord (rope) attached. Loop it over the post, back to the sail 2 or 3 times to get some leverage.
- Get the sail into a position you’re happy with, then measure each gap. If necessary, order some turnbuckles and/or cable trace from our hardware page.
- Attach and tighten the turnbuckles sequentially until you have enough tension on the sail. The fabric should be pulled tight and the cable should be pulled tight. If your fixing points are strong, you can put plenty of tension on the sail. Use your judgement. The tighter the sail, the better it will handle storms.
Need some help installing your sail? Give us a call or send us an email and we’ll be happy to help.

SUMMER SPECIAL
Standard Shape Shade Sails
316 Stainless Steel Cable Edged
Fully Swaged, ready to install
SELECTED COLOURS DISCOUNTED
Red, Sunflower, Olive
Shade Sail Fabric Range
Check out our latest colour selection
CUSTOM MADE SHADE SAILS - INSTANT ONLINE QUOTE
It is Industry Standard to charge by EDGE Metres, not SQUARE Metres.
Our online Price Calculator uses only 3 simple steps to give you a quick DIY Shade Sail Price. Choose your Fabric, select the number of points on your Shade Sail and input your Edge / Perimeter measurements. Example – How to find the Edge Metreage of your Shade Sail
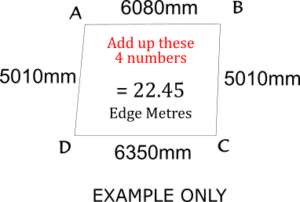
This example of a 4 pointed Shade Sail is 22 Edge Metres (rounded down) The Price in our Commercial Grade Shade Sail Fabric is $847.00 + GST

STAINLESS STEEL PERIMETER CABLE
The Stainless Cable Edge is the single most important feature in the manufacture of a Shade Sail. The imposters who try to sell webbing strap edged, cloth edged and rope edged custom made Shade Sails are not the real deal. If you buy a webbing strap or cloth edged Shade Sail, you cannot stretch the fabric tight, and therefore, you have just wasted your money. The Stainless Steel Cable Edge in a properly made Shade Sail moves through the hem independently of the fabric. The SST cable forces the fabric to stretch drum tight and this is where the Shade Sail gains its ability to ride the storms.

PLANNING YOUR DIY SHADE SAIL
In most cases, a Shade Sail is secured to a combination of Steel Posts cemented into the ground and Brackets and Fittings, Bolted or Screwed to a Building. Path of least resistance is a good rule of thumb when selecting Fixing Points on Built Structure.

HOW TO MEASURE YOUR CUSTOM DIY SHADE SAIL
To make a Shade Sail, we need an exact set of absolutely precise measurements to guarantee a perfect fit. The best way to do this is with a Fibreglass Tape attached to the edge of the eyebolt of each fixing point. Give each point a letter starting with A then clockwise around the points marking them B, C, D etc.
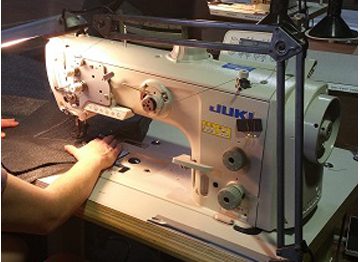
Shade Sail Factory Machinists
Operating our brand new computerised Juki (one of five)

Shade Sail on Factory Floor
20 metres x 7 metres (10 fixing points) Massive 55.775 Edge Metre Shade Sail. Don’t try to do a Shade Sail this big unless you know what you’re doing.
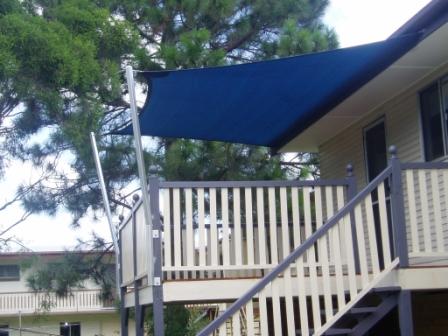
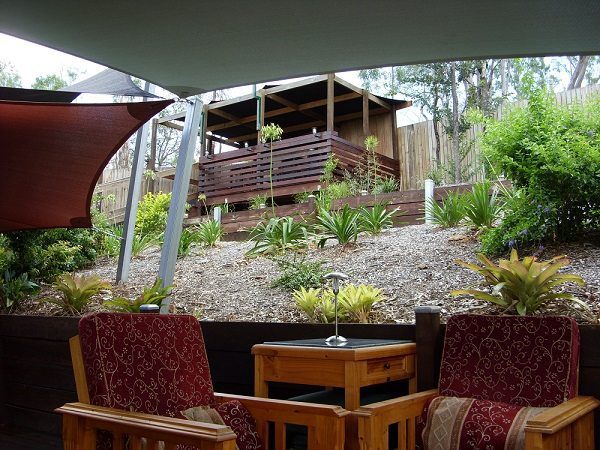
DIY Deck Shade Sail Installed by Home Owner.
Note the lovely Ocean Blue colour which, according to Psychologists, puts you in a good mood.
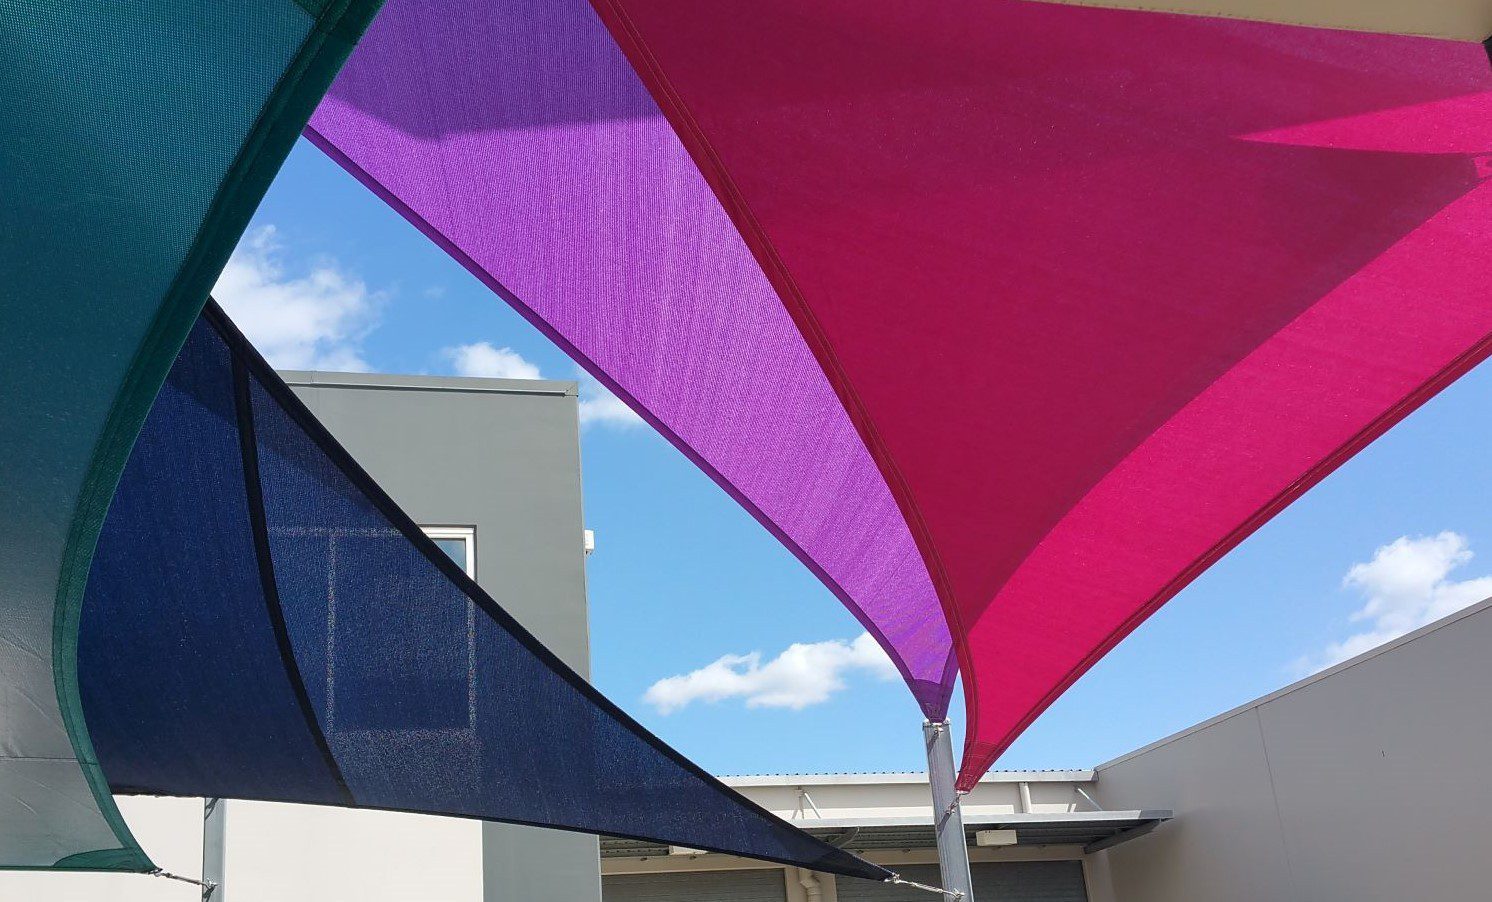
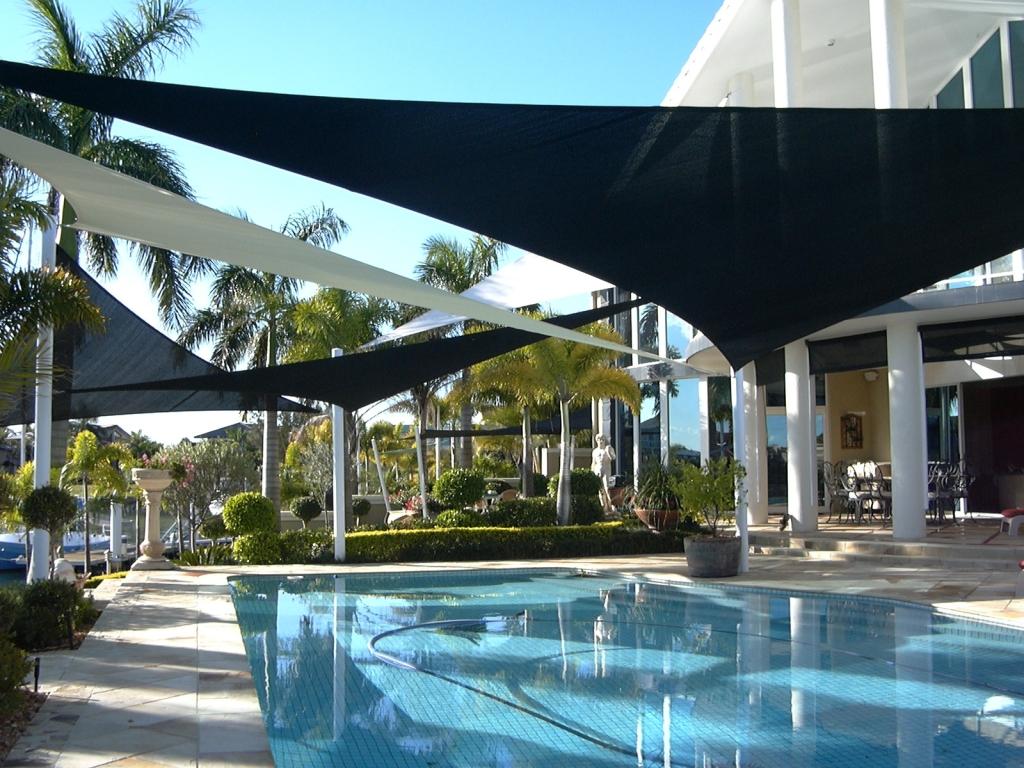
Multi coloured Sails
Waterproof Shade Sail on left, with 3 Fabric Sails
Triangular Pool Sails
Brisbane Bayside
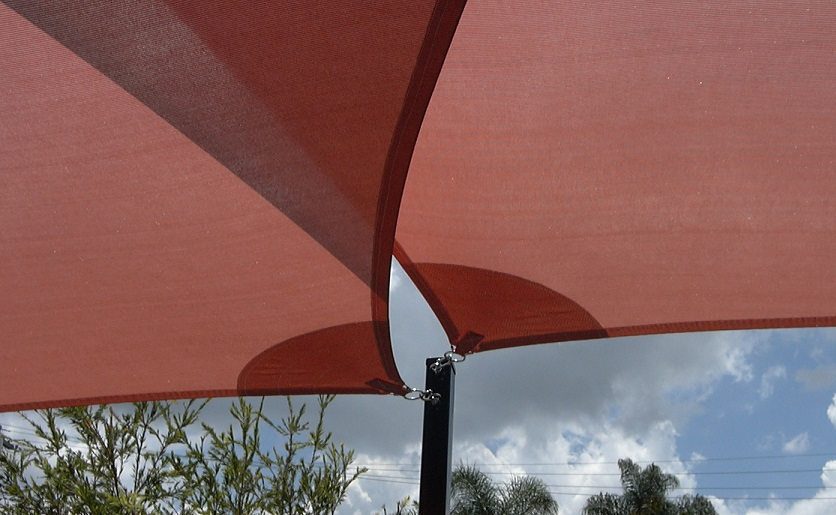
2 Shade Sails attached to middle Post
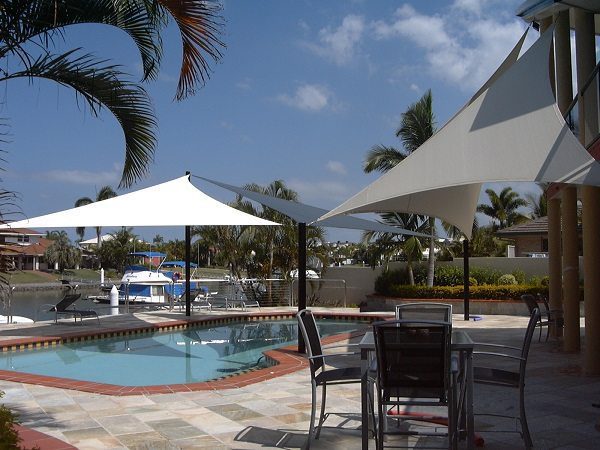
Swimming Pool Shade Sails
Canal Front Pool Deck
Waterproof Shadecloth Deck Shade Sail
To get a Price for your Custom DIY Shade Sail, add up the edge meters of your Shade Sail, from fixing point to fixing point. Choose your preferred Shade Sail Fabric, or Waterproof Shade Sail Fabric. Choose the number of points on your Shade Sail and enter the perimeter measurement into the DIY Shade Sail Price Calculator.
CUSTOM MADE DIY SHADE SAIL PRICE CALCULATOR
Price Calculator – get an instant online Quote for your Custom Shade Sail