PLANNING YOUR DIY SHADE SAIL
Shade Sail Posts - Shade Sail Brackets - Shade Sail FittingsPLANNING A DIY SHADE SAIL
- In most cases, a Shade Sail is secured to a combination of Steel Posts cemented into the ground and Brackets and Fittings, Bolted or Screwed to a Building. Path of least resistance is a good rule of thumb when selecting Fixing Points on Built Structure. You can’t have your Points exactly where you want them in most cases. Where can you have them? Where you can find a strong, accessible position! Getting into the frame where possible is the first rule.
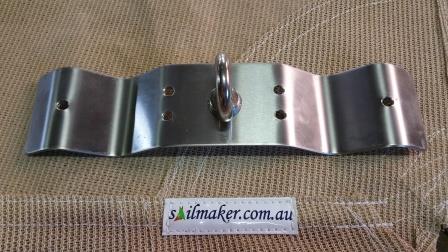
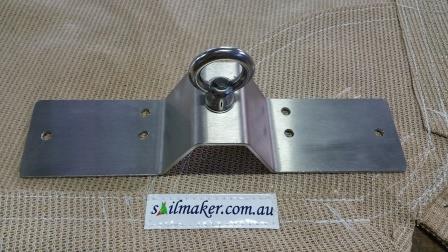
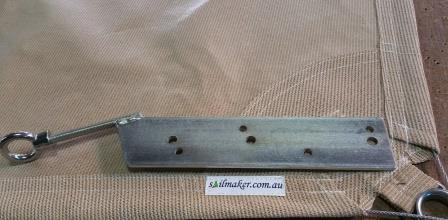
- If fixing onto the roof, a standard Shade Sail Roof Bracket is the best choice. Screw and Bolt to the Trusses, then flash after replacing Colourbond Sheeting or Roof Tiles. If you don’t flash properly your roof can leak. Brick and Block Work requires specialised Brackets or Plates which will work best with a Chemical Anchor Base to attach Stainless Dyna Bolts or Chem Set Studs.
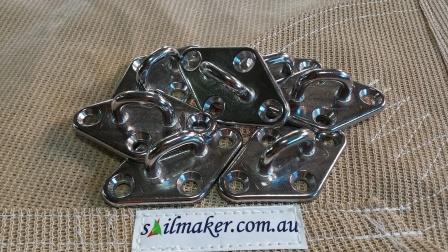
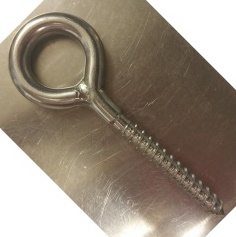
- If you are fixing to Timber, SST Screw Eyes are an excellent choice to get into the frame strongly. Pilot Hole first then, screw in to the limit. Screw Eyes and Diamond Pad Eyes are the first choice of Pro Shade Sail Installers. Remember, strength is the most important value.
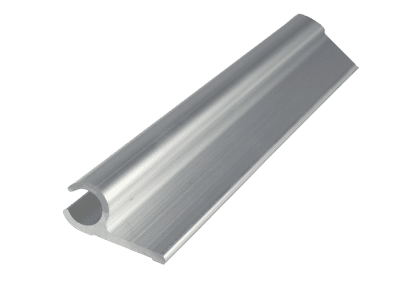
- Aluminium Shade Sail Track is a very practical way to stop water penetration along a wall. Screw the Shade Sail Track to the surface with an eye nut at either end of the Shade Sail Track on exactly the same plane. An ideal gap is 50mm between the eye nut and the Shade Sail Track at either end. This allows easy access for sliding the Shade Sail into the Shade Sail Track. We attach a product called Keder, which sews directly to the Shade Sail and is easy to install. Sailtrack can be attached to one edge only of a Shade Sail.
- The Shade Sail will be custom made to exactly match the points. Be sure to have line of sight between each point and overdo the strength. Sooner or later a massive storm is going to come along and test your work out, so overdo everything. Overkill is the pro Shade Sail Installers’ mantra.
- A common error is making the Shade Sail too large for practical purposes. 1 large Shade Sail is ‘eggs all in one basket’. Better to do 2 medium size Shade Sails which will weather the storms better.
- Without exception, in Australia, the Sun moves in a Northerly transit, from East to West. This means you need to lower the Northern aspect of your Shade Sail. The Southern aspect can be as high as you want, but prudent to lower the Northern side.
- Important to note that a DIY Waterproof Shade Sail requires substantial fall to stop water ponding. Be sure to take this into account when you design a DIY Waterproof Shade Sail.
- Direct Embedment of Galvanised Steel Posts is the Pro Shade Sail Installers’ bread and butter. Rule #1 – ‘THE HIGHER YOU GO, THE DEEPER THE FOOTING, THE BIGGER THE POST. If you get this right, it’s downhill from there. Here’s a trick used by the Pros. After you have dug your Footing (minimum 1000mm x 300mm) Sledge Hammer into the Footing, a 1200mm Star Picket well below the ground level. Use the top of a Crowbar to keep driving the Star Picket down into the Footing. Keep to the side of the Footing to leave room to drop the Post in after concreting. The Star Picket will then extend 800mm – 1000mm below the bottom of the Footing and will become a Sea Anchor, guaranteeing the Footing will not pull forward. The orientation of the Post is tilted back 7 degrees and aligned to the middle of the sail, effectively bisecting the corner of the Shade Sail. You may need to look at an example to understand this correctly.
- Galvanised Steel Posts are the best choice for hanging a Shade Sail. As a rule, the height of the post determines the wall thickness and size. If you want to be 2 metres out of the ground, you could get away with a 65mm x 65mm x 2mm wall post. As you go up in height, so too you should increase the size of the post and the depth of the footing. To hang a large Shade Sail, eg. over a caravan, you might need to go up to 125mm diameter posts with 5mm wall. Be guided by the size of the Shade Sail and the height out of the ground. If you are 4 metres out of the ground, you should have a 1200mm – 1500mm deep footing.
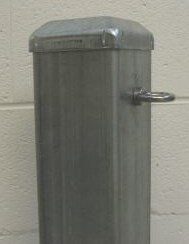
- The best fittings to put on the post are Stainless Steel Eyebolts, readily available online from many Suppliers.
- Note: 316 Stainless Steel Turnbuckles and D Shackles are included in the purchase price of your Custom DIY Shade Sail.
- For all ‘Standard Shaped Shade Sails’, Turnbuckles and D Shackles sold separately.
- Because we use hook ended Turnbuckles, you do not need a D Shackle if you use a
Turnbuckle on a corner.
Remember – OVERDO THE STRENGTH OF THE FOOTING.
CUSTOM MADE DIY SHADE SAIL PRICE CALCULATOR
Price Calculator – get an instant online Quote for your Custom Shade Sail
DISCLAIMER
NO LIABILITY ACCEPTED WHATSOEVER IN THE EVENT OF FAILURE OF ANY DIY SHADE SAIL / PROJECT PURCHASED FROM DIYSHADESAILS.NET.AU. We are unable to offer design and building advice. Please note, our service extends only to the manufacture of the Shade Sail. Consult with a Building Professional before first embarking on a DIY project. Consult with your Local Regulatory Authority as Planning Laws vary. By placing a Shade Sail Order you agree to our Terms and Conditions.
Colourbond Profile Stainless Steel Roof Bracket
316 Stainless Steel Roof Bracket fitted off with 316 SST 10mm Eye Nut
Trimdeck Stainless Steel Roof Bracket
316 Stainless Steel Trimdeck Profile fitted off with 316 SST 10mm Eye Nut
Stainless Steel Diamond Pad Eyes
316 Stainless Steel Diamond Pad Eyes. DIY Shade Sail Installer’s Best Friend
Shade Sail Post and Fitting
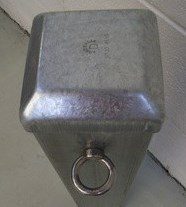
Galvanised Steel Shade Sail Post with 316 Stainless Steel Eyebolt – Overhead view
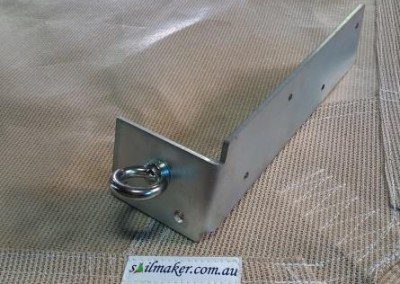
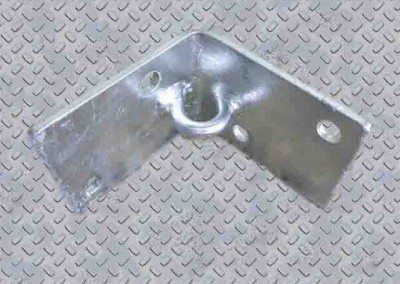
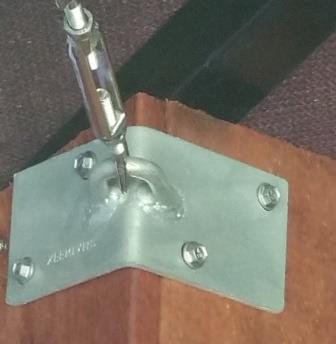
Shade Sail Roof Rafter Bracket
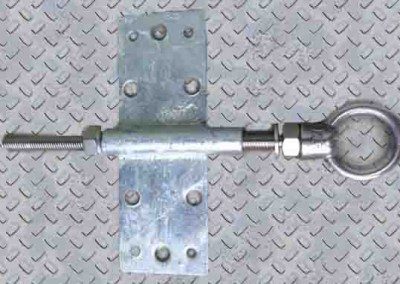
Rafter Bracket – Hot Dip Gal Steel Roof Bracket with 16mm Stainless Steel Threaded Rod & 16mm Stainless Steel Eyenut

