DIY CUSTOM SHADE SAIL
INSTALLATION INSTRUCTIONSDIY CUSTOM SHADE SAIL INSTALLATION GUIDE
©DIY Shade Sails Australia
Your new Custom DIY Shade Sail comes with everything you need to properly install it. Included are – All Stainless Steel Fittings (Turnbuckles, D Shackles, SST Perimeter Cable and Cable Grip or Grips) plus 4 metres of Starter Cord to pull the Shade Sail onto the fixing points.
Fittings are not included with any Standard Sail purchase.
- Seams and Hems face up. (The thread suffers less mould build up and dries out better by facing skyward, greatly reducing the thread rot) The underside is almost always the presentation side, which is another good reason for having the seams and hems facing up. Incredibly, many of our competitors do not understand this and make their Shade Sails with the hems and seams facing down.
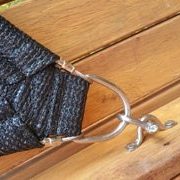
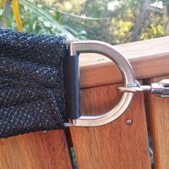
- Attach Direct Fix (D Shackle) Points first, if any. Make sure the cable is correctly inside the D Shackle.
- Open and lubricate the Turnbuckles. This is most important as Stainless Steel is brittle and likely to seize. Use any one of – Sewing Machine Oil, RP7, WD40, Spray Silicon, Lanox, Vaseline, Axle Grease etc. Make sure each end is open to the same distance as the opposite end, Each Turnbuckle has a right and left thread. Also lubricate the corner fitting (D Ring) cable groove to stop the cable sticking as you tighten the Shade Sail.
- Hang Turnbuckles off posts/fixing points. Ensure that the Turnbuckle has right turning end on the post/fixing point, left hand end on the Shade Sail. This is useful later as you will know to turn the Turnbuckle clockwise as you face the post.
- Now start attaching the next points to the turnbuckles. Attach starter cord to the corner of the next point of the Shade Sail then loop over fixing point, back to Sail 2 or 3 times to achieve leverage.
- Wearing Gloves to protect your hands, pull the corner close enough to attach Turnbuckle.
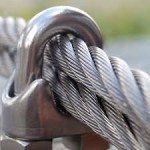
- Attach all remaining points of the Shade Sail using this method. Tighten each Turnbuckle 15 turns, then pull the Cable and Cable Grip tight against the D ring. Face Cable Grip out to allow access for closing the nuts on the Cable Grip.
- Then close the nuts working from side to side. Turn each nut a few turns at a time to ensure they are closed equally. Make sure the Cable Grip is tightly closed. This is most important to stop the Cable moving. (Do not over tighten)
- Now go back to the Turnbuckles and keep closing them until you have a sufficient amount of tension on the Shade Sail. Look to see the Fabric pulled tight and the Cable pulled tight. If you are confident in your Fixing Point strength, you can give it plenty and the Shade Sail will be drum tight. Use your judgement. The tighter the Shade Sail, the better it will handle the storms. Exercise caution however, as your points may not be as strong as you would like.
- When you are finished, and only then, using 2 spanners, lock the Turnbuckle Nuts. If you don’t do this properly they will vibrate loose eventually.
NB: Shade Cloth can tear if it catches on, eg. a box gutter corner etc. All care must be taken
TIGHTENING THE TURNBUCKLE
Waterproof DIY Shade Sail Installation Instructions
For Instructions on installing DIY Waterproof Shade Sails – click here


